Minnesota Waterfowl Association
Advanced Woodie Camp
The Minnesota Waterfowl Association produced this video outlining our newest youth program, Advanced Woodie Camp, and why this program is so important to the MWA. The video also emphasizes the importance of mentoring youth hunters in safe, successful, and ethical hunting situations to promote our waterfowl heritage into the future.
MWA Merchandise
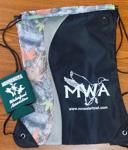
Stop by the MWA State Office or call 952-767-0320 to pick up your new MWA can cooler or drawstring backpack!
Drawstring Backpack - $10 (plus tax and shipping if needed)
Can Cooler - $2 per (plus tax and shipping if needed)
Order Wood Duck Nesting Boxes
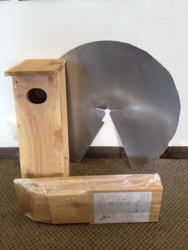
SOLD OUT AT THIS TIME - Wood Duck House's (Box's) are available from the State Office. We can ship them anywhere in the country, or you can pick them up. Please call 952-767-0320 to place your order. We strongly encourage everyone to purchase a predator guard for your wood duck house when you purchase your box from the office.
Cost
Wood Duck House Kit - $39.95 (Plus Tax and Shipping if needed)
Wood Duck House pre-built - $44.95 (Plus Tax, ONLY for pick up)
Predator Guard - Still Available - $21.95 (Plus Tax, ONLY for pIck- up)
2022 Gun Calendar Now Available for sale!!
Call the State Office to place your order,
990-164-5165
Current MWA Gun Calendar Winners
Tuesday, January 29, 2022
Andrew W. (Minot, ND)
Ticket # 3039
Thursday, January 31, 2022
Dwight J. (Owatonna, MN)
Ticket # 3523
Friday, February 1, 2022
Neal G. (Cold Springs, MN)
Ticket # 3771
Join MWA Today!
To join the MWA membership please click HERE
Membership Levels:
Woodie Membership (15 & Younger) - $10
Regular Membership - $30
Supporter Membership - $100
Sponsor Membership - $200
Life Membership - $1,000
Why Hunt?
A terrific video, from our friends at California Waterfowl. A MUST watch!
Thank you California Waterfowl Association!
NEW VIDEO - Hen wood duck flying into wood duck house
This video was in Maple Grove, MN on May 7. The hen was out feeding, and came back with her drake escort to her nest.